

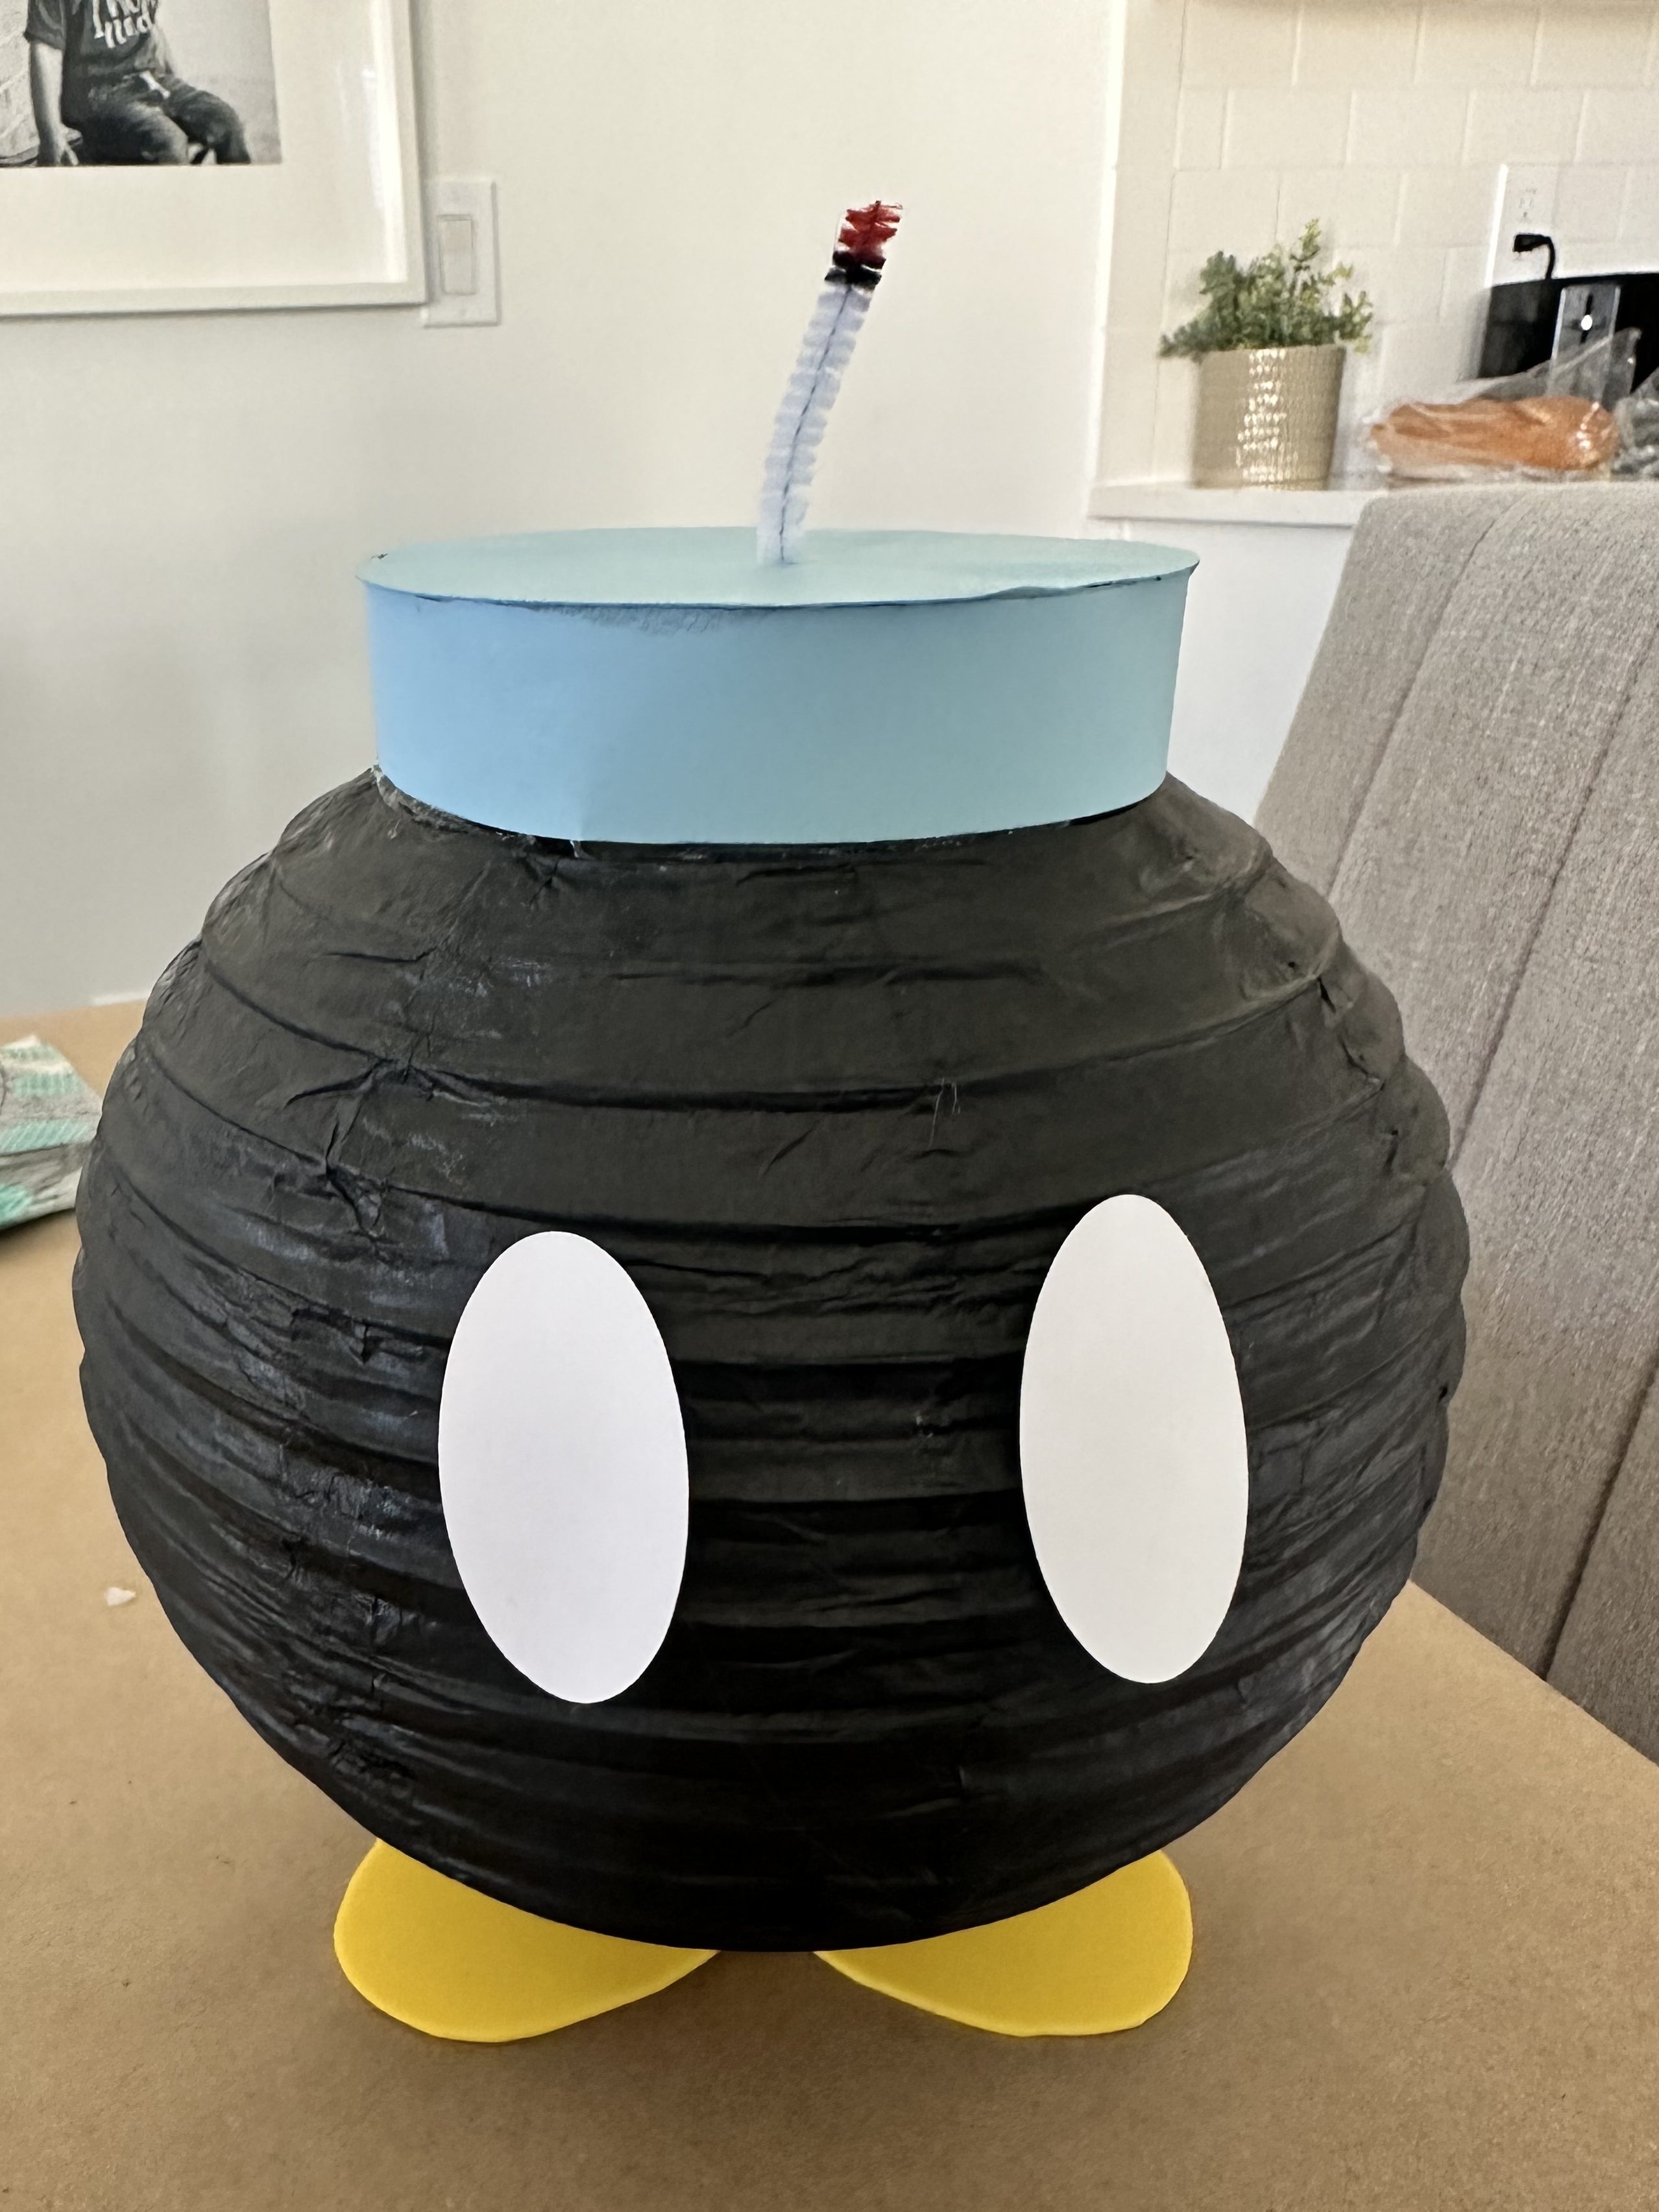
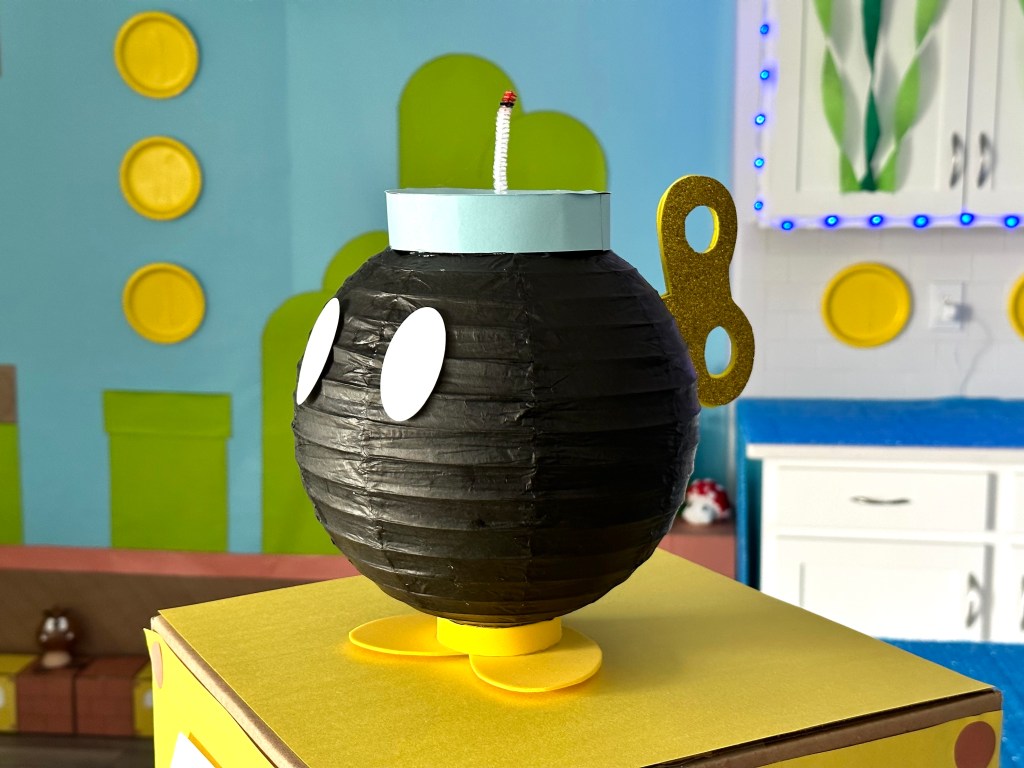
No Mario party is complete without Bob-ombs lurking around! These little guys ended up being the most challenging build of all my Mario decorations, which is why I decided to put together a full tutorial. I pieced mine together after seeing some inspiration on Pinterest, then experimenting until I figured out a method that worked for me. It wasn’t exactly quick and easy (let’s just say paper lanterns don’t love having things glued to them), but the end result was totally worth it.
➡️ Free Printable Bob-Omb Stencils
To make this project even easier, I created a set of printable stencils for the eyes, feet, hat top, and winders. [Download the free Bob-Omb stencils here] and print at 100% scale. Cut them out and use them to trace onto craft foam or cardstock.
Supplies You’ll Need
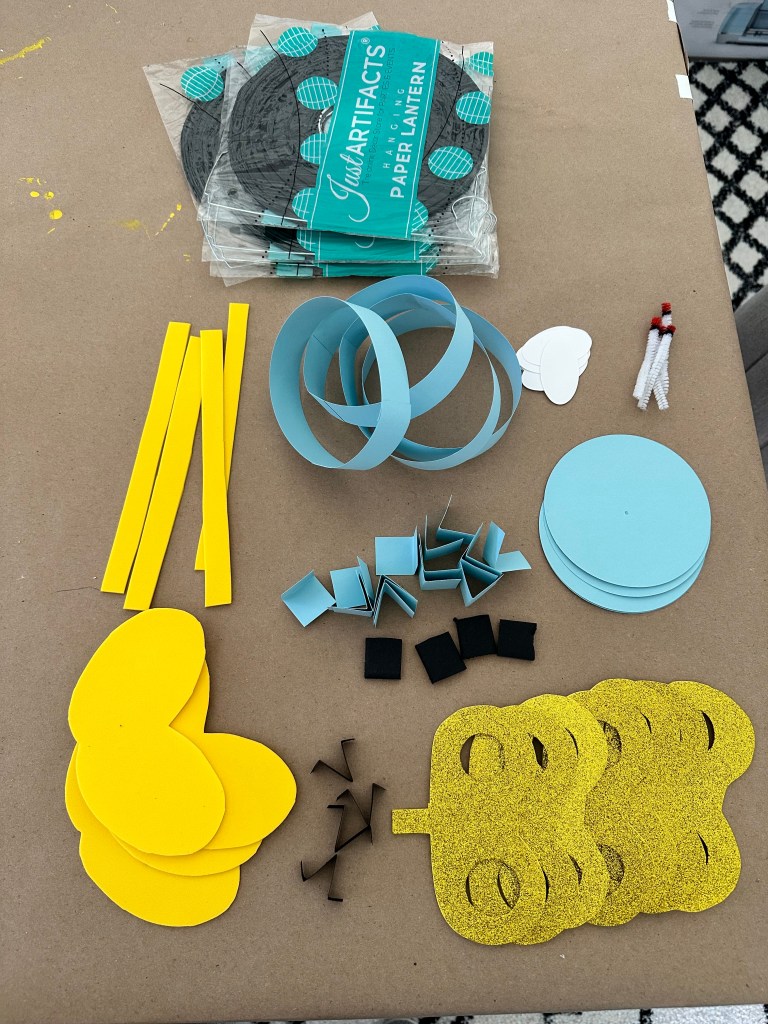
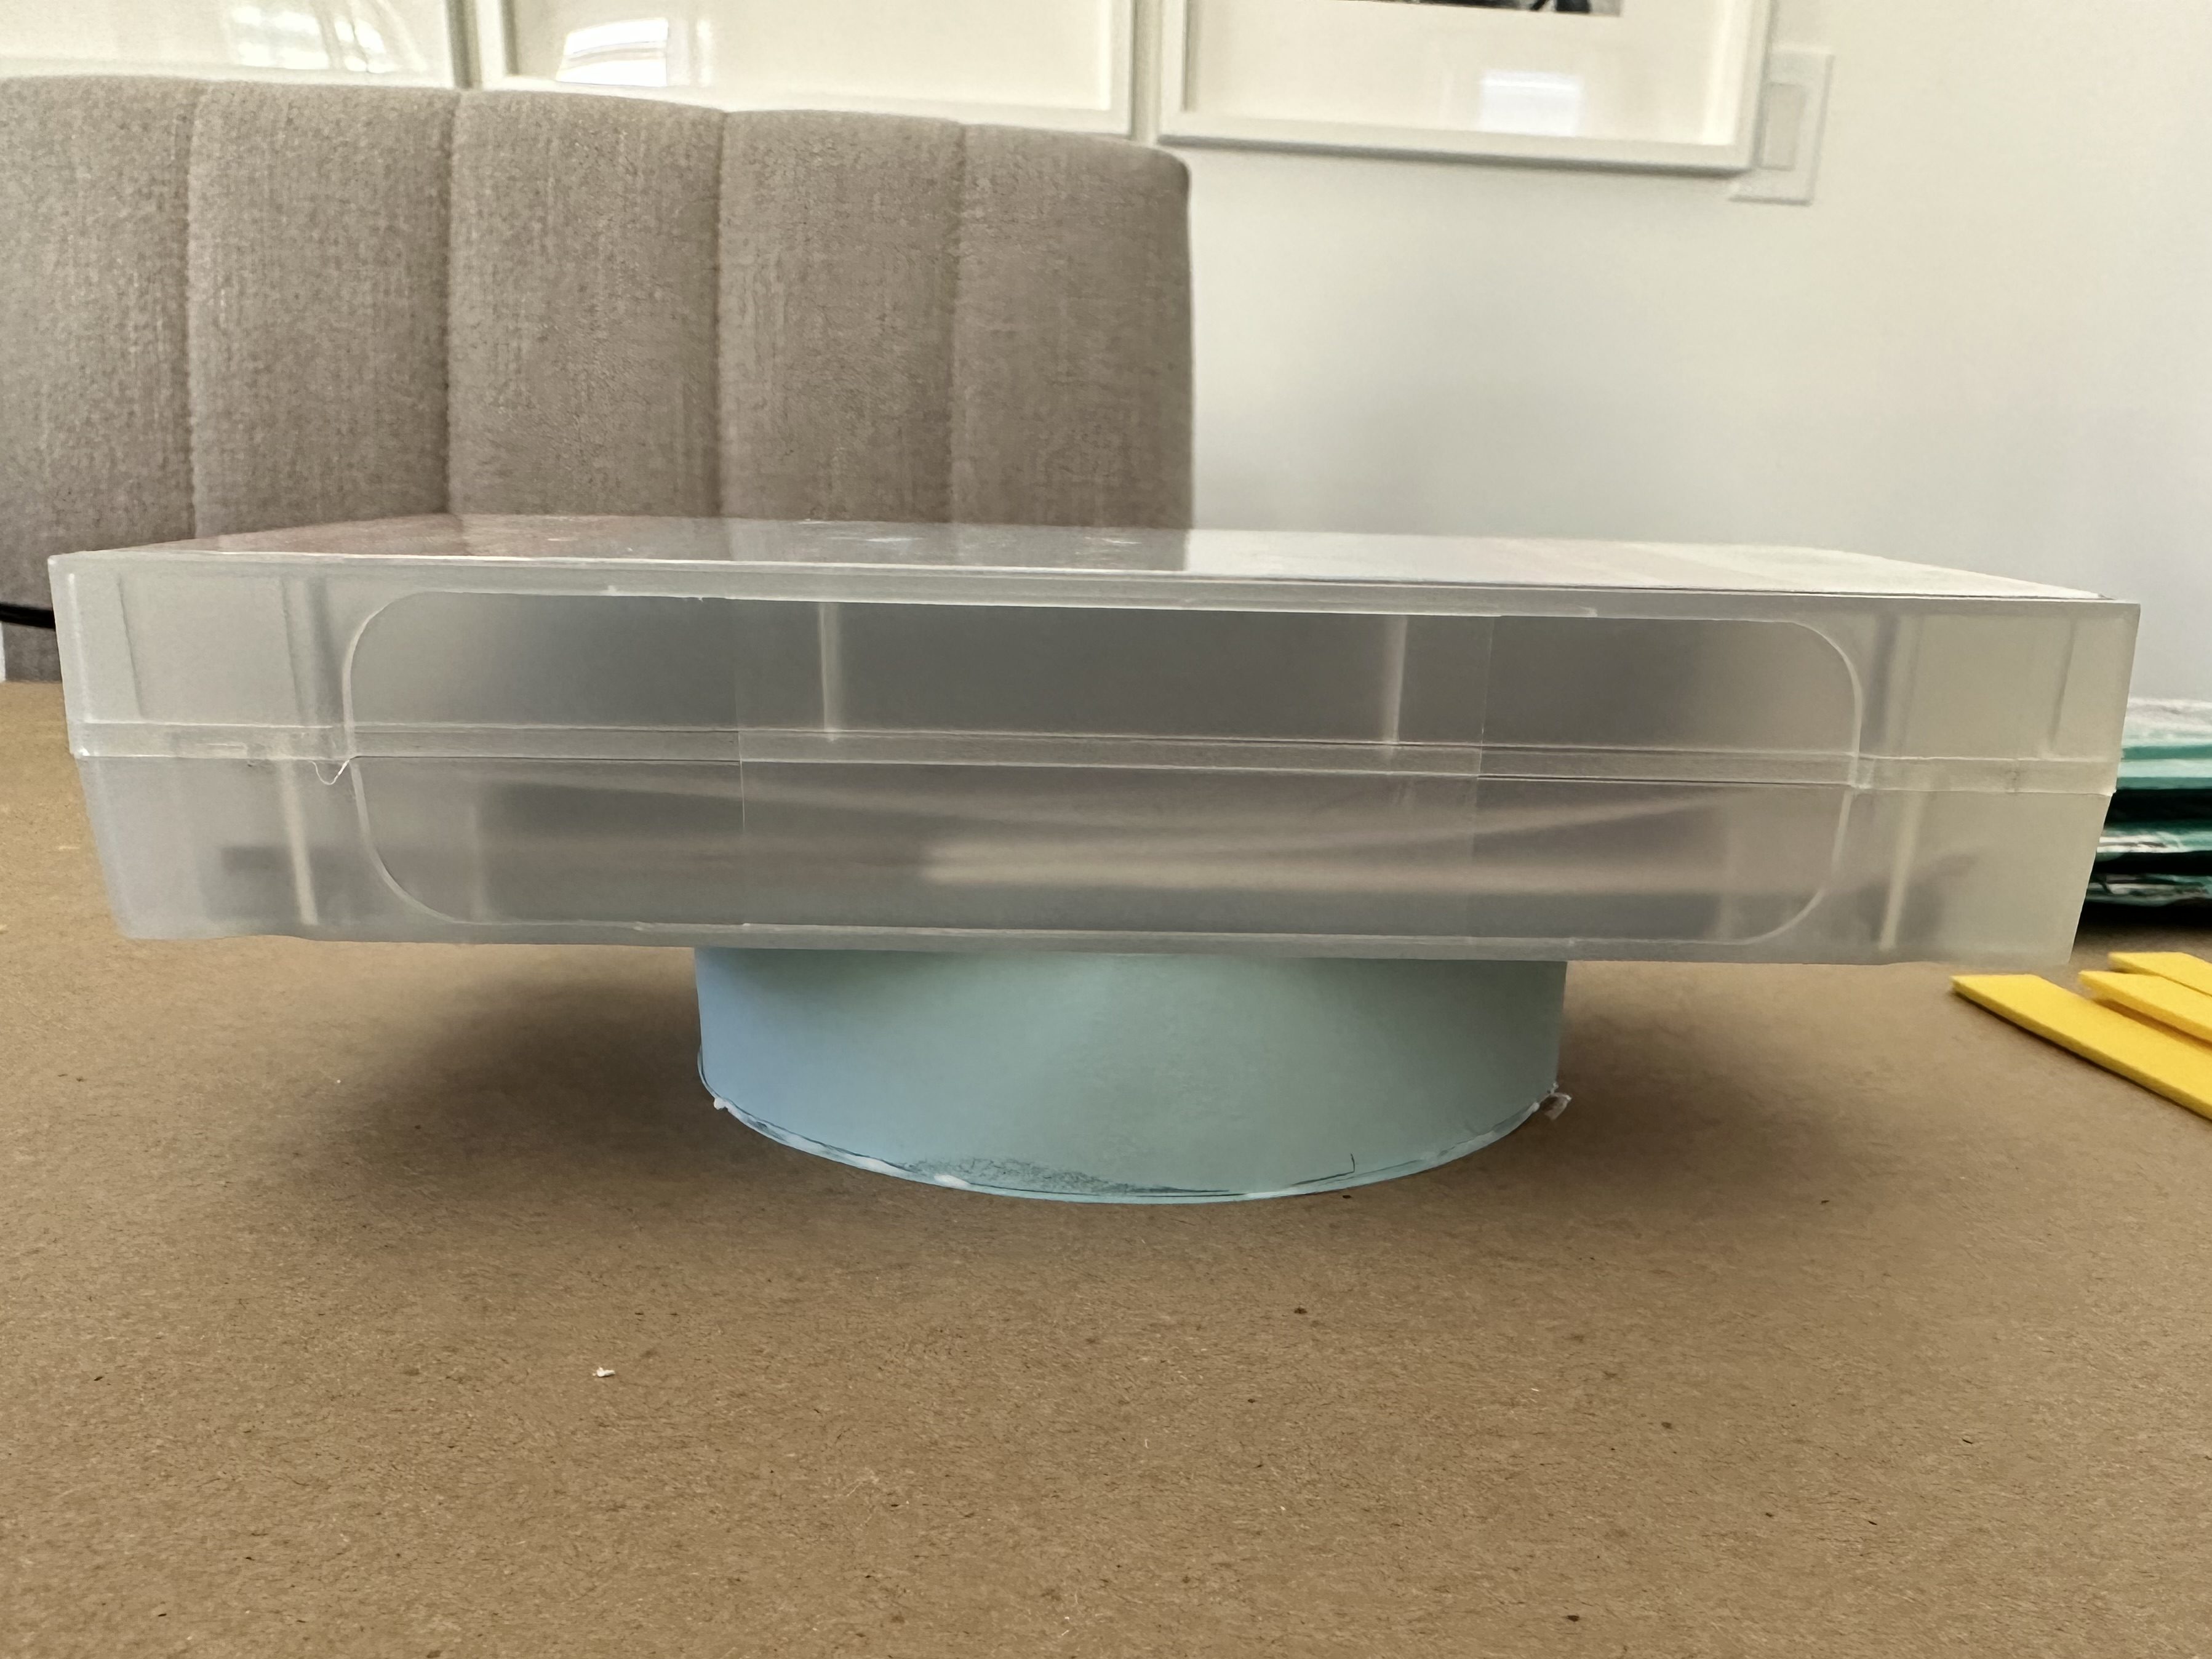
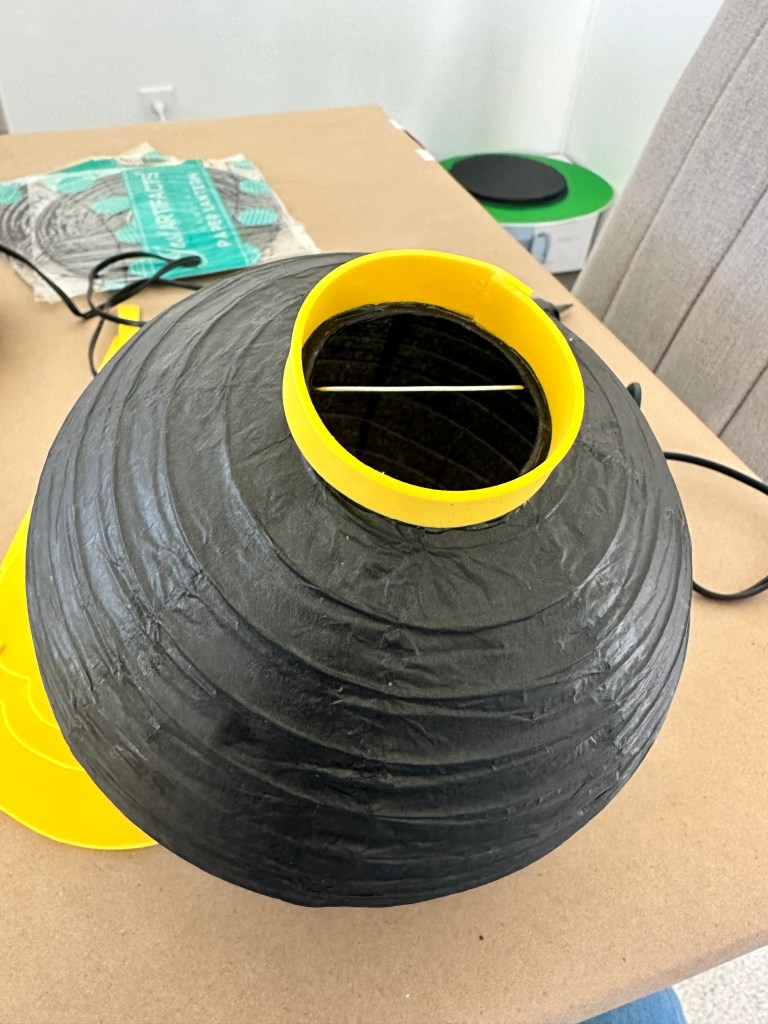
- 8” black paper lantern – forms the Bob-Omb’s body.
- Yellow craft foam – cut into a strip (used for the top edge of the feet).
- Yellow craft foam feet – trace and cut using the stencil printable.
- Blue card stock circle (hat top) – trace and cut using the stencil printable, then poke a small hole in the center for the fuse.
- Blue card stock strip (hat band) – cut into a strip and glued into a ring the same diameter as the circle.
- Blue card stock rectangles – cut into 4 small rectangles, each folded in half (used to support the hat).
- White card stock eyes – trace and cut using the stencil printable.
- White pipe cleaner – cut short and colored with orange and black Sharpie to look like a fuse.
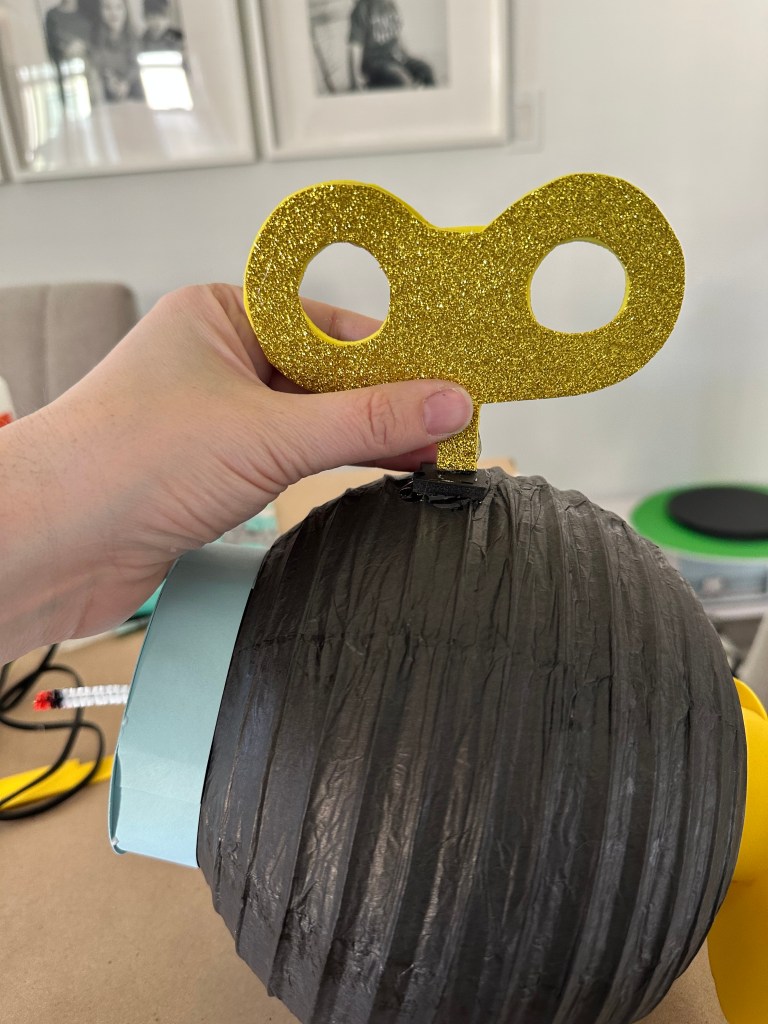
- Black foam core (small scrap) – used to attach the winder.
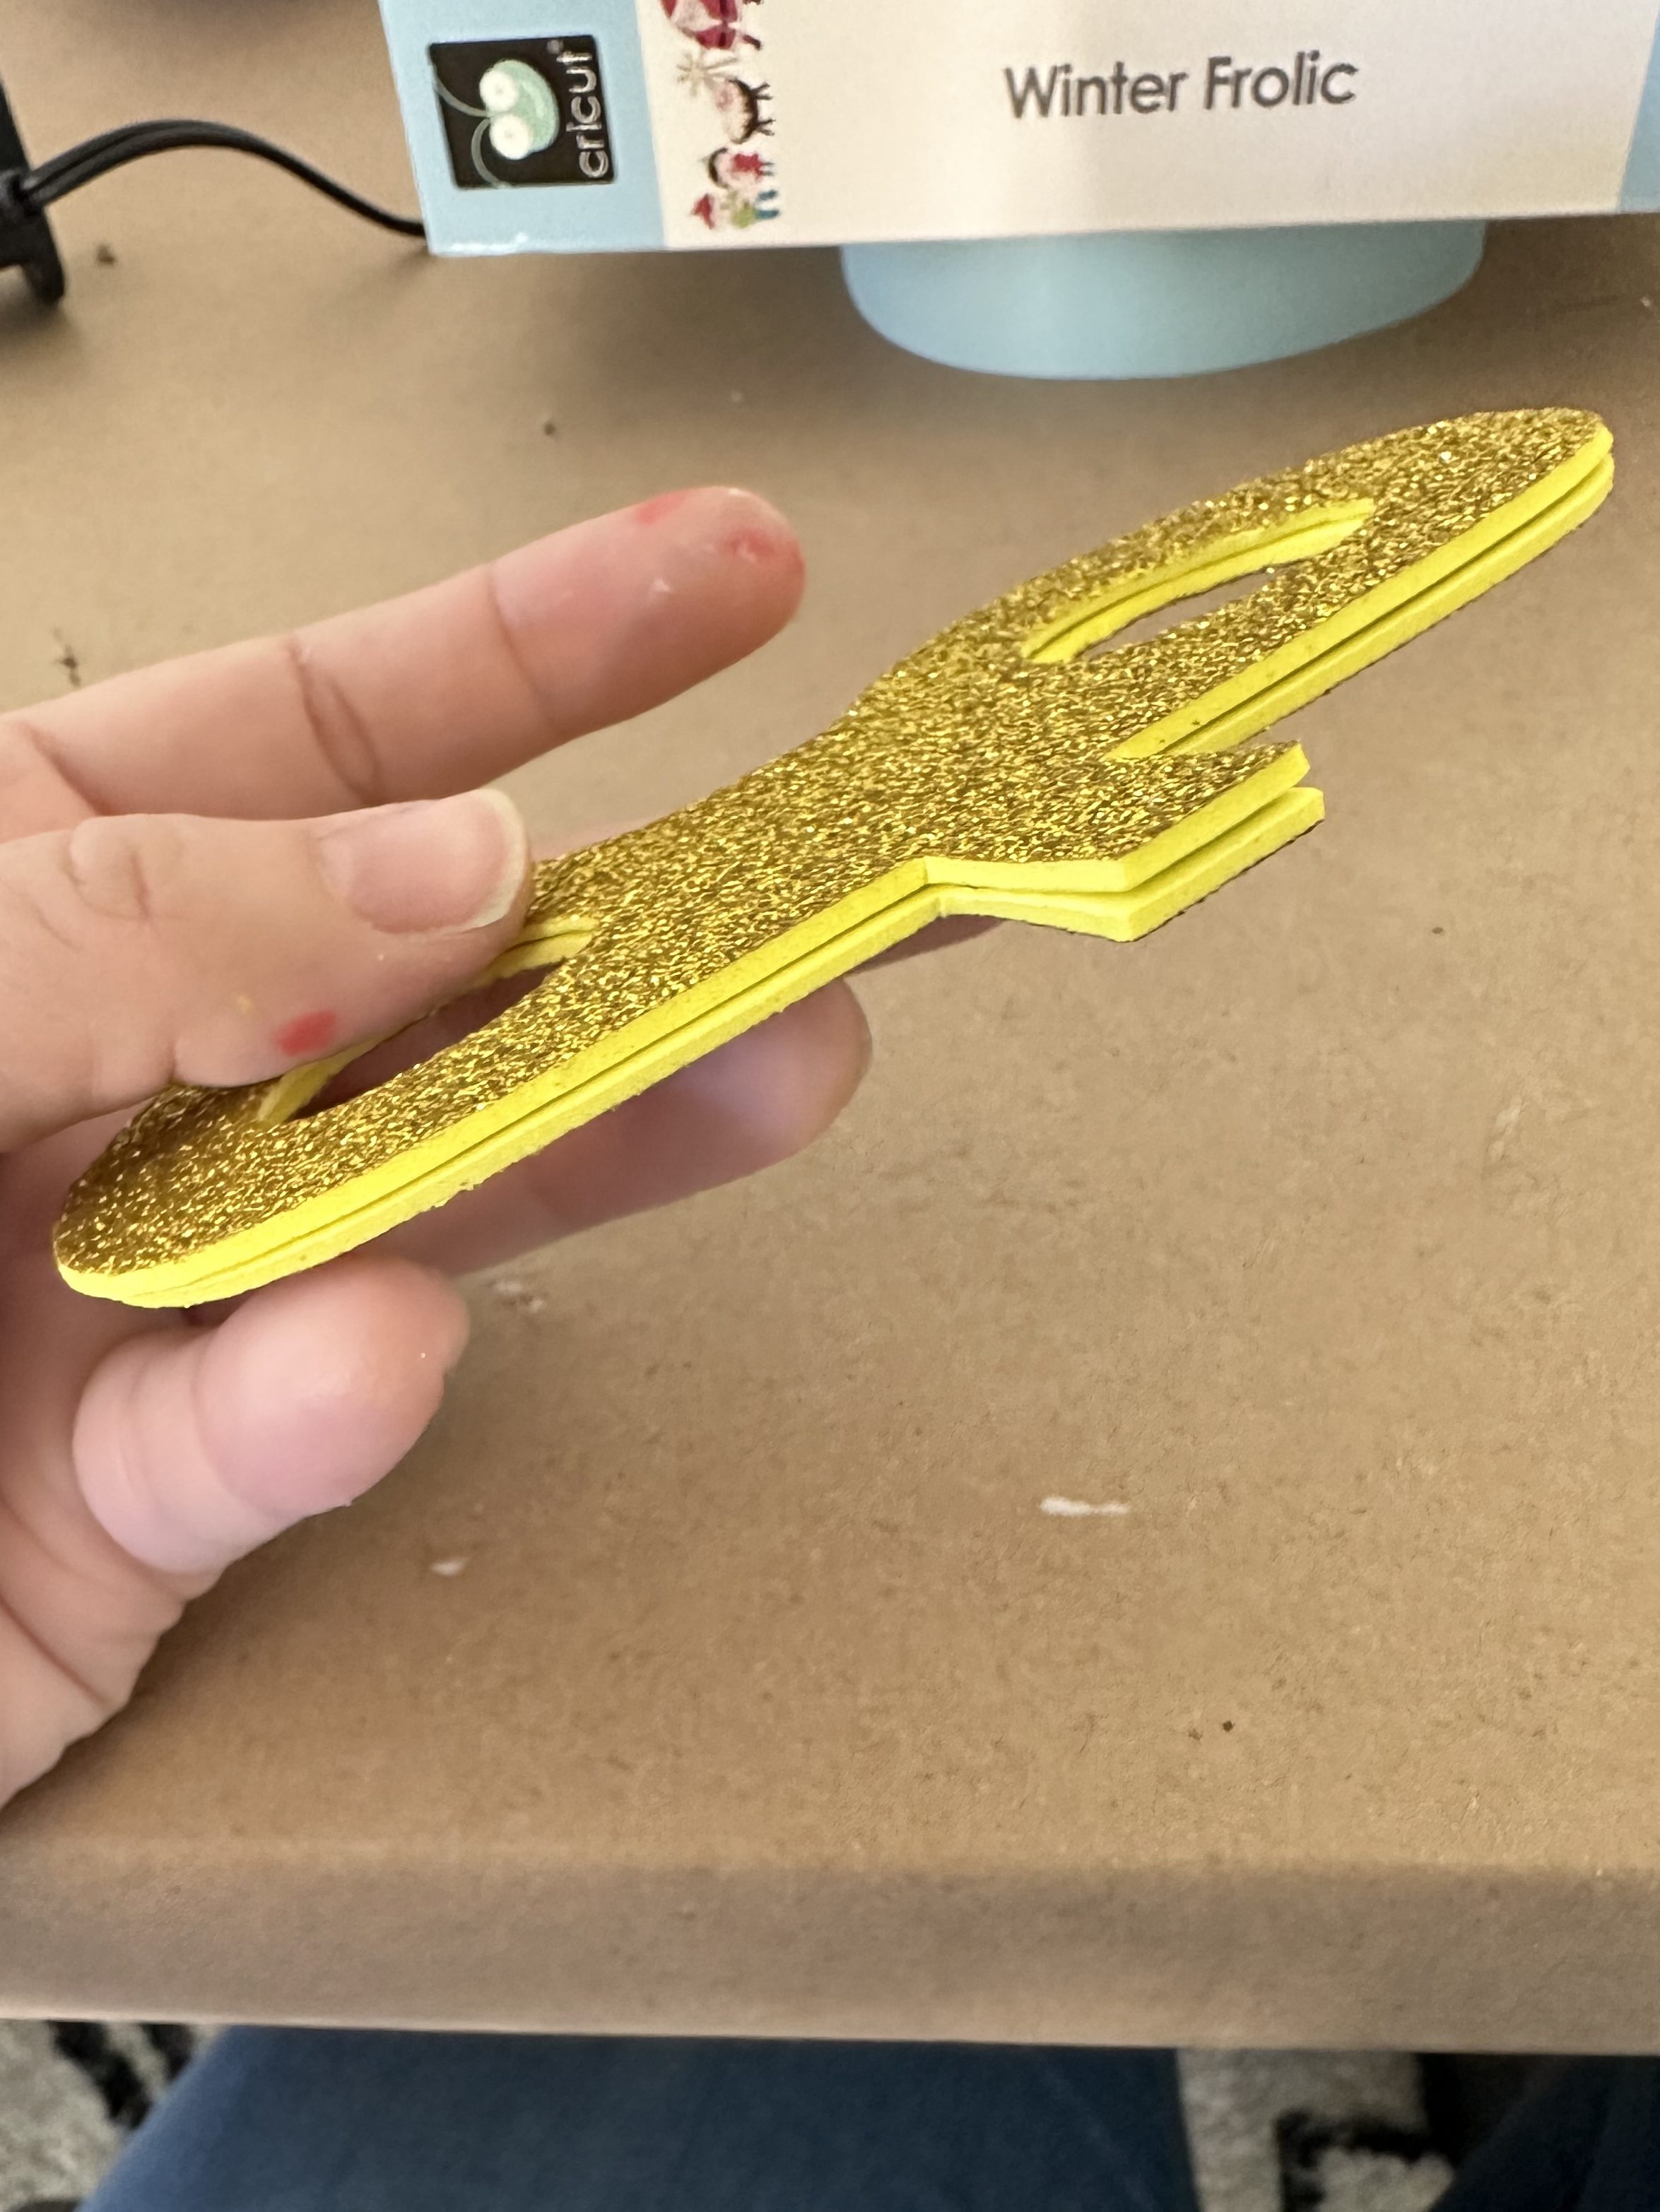
- Glitter gold craft foam winders – trace and cut using the stencil printable (2 per Bob-Omb).
- Thin strips of black card stock – folded into a “bird shape” to help anchor the winder.
- Glue – both hot glue and white glue.
- Weights for stability – I used metal mending plates hidden under the feet.
Step 1: Build the Hat
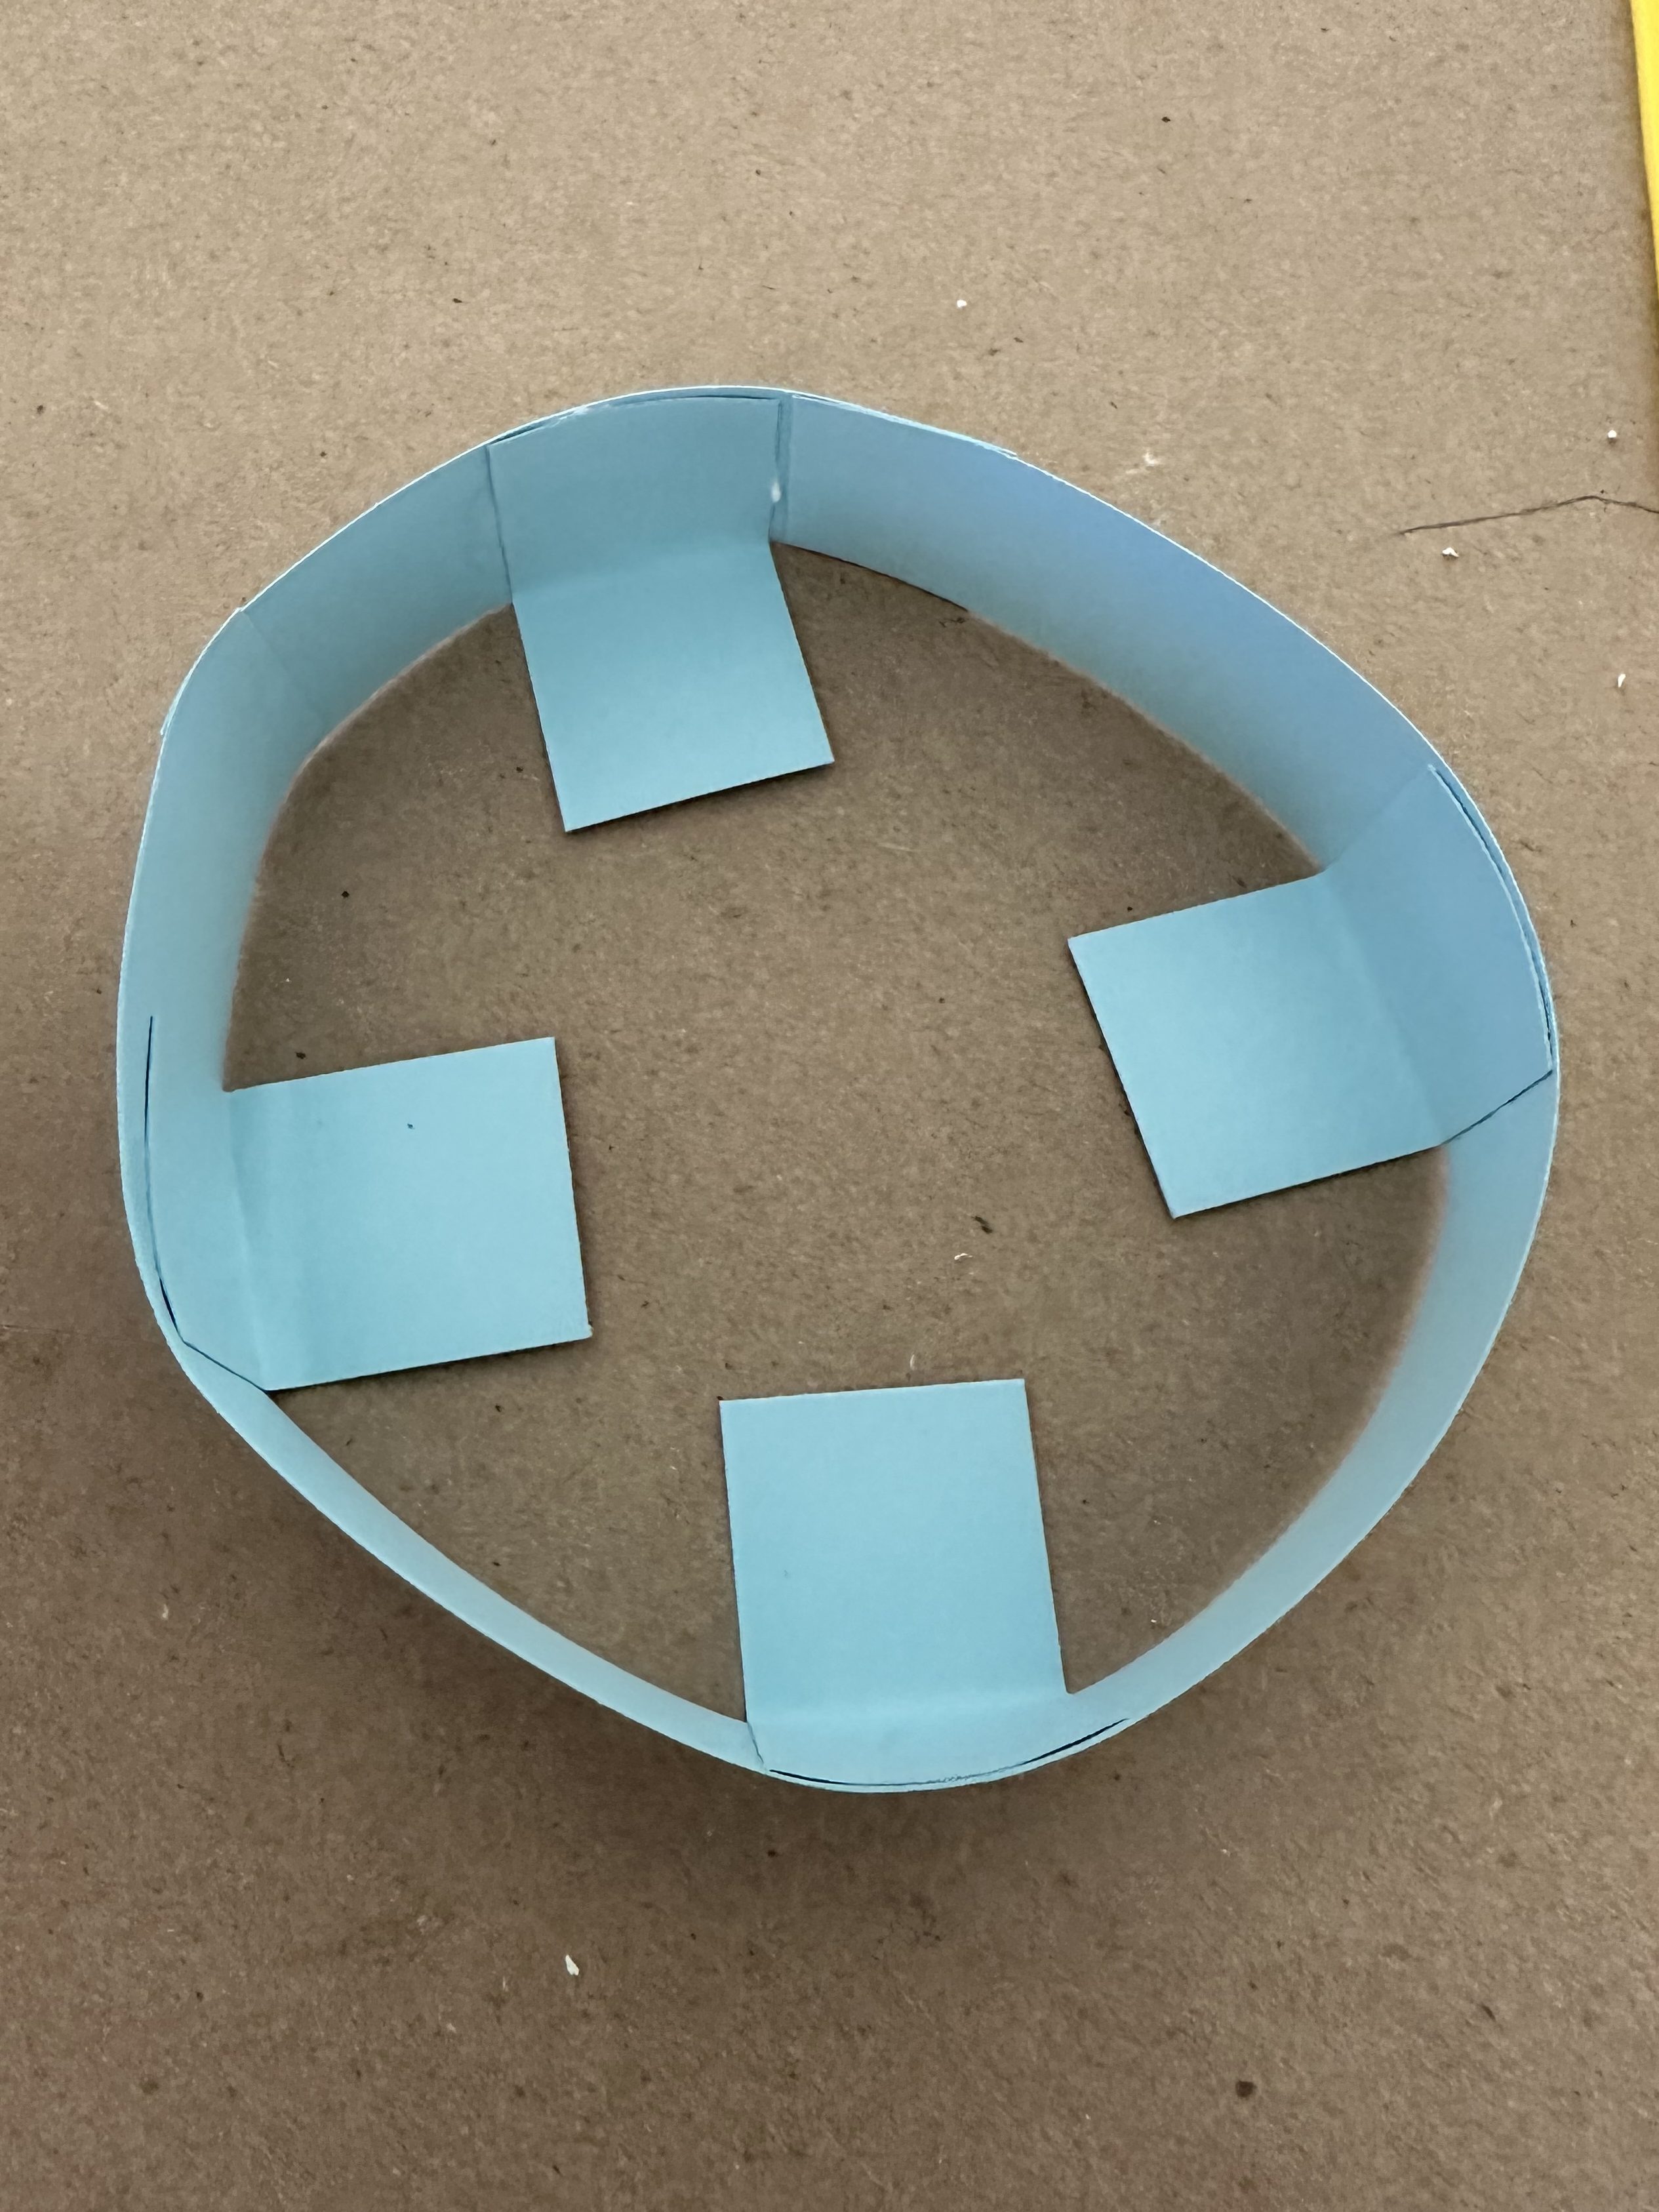
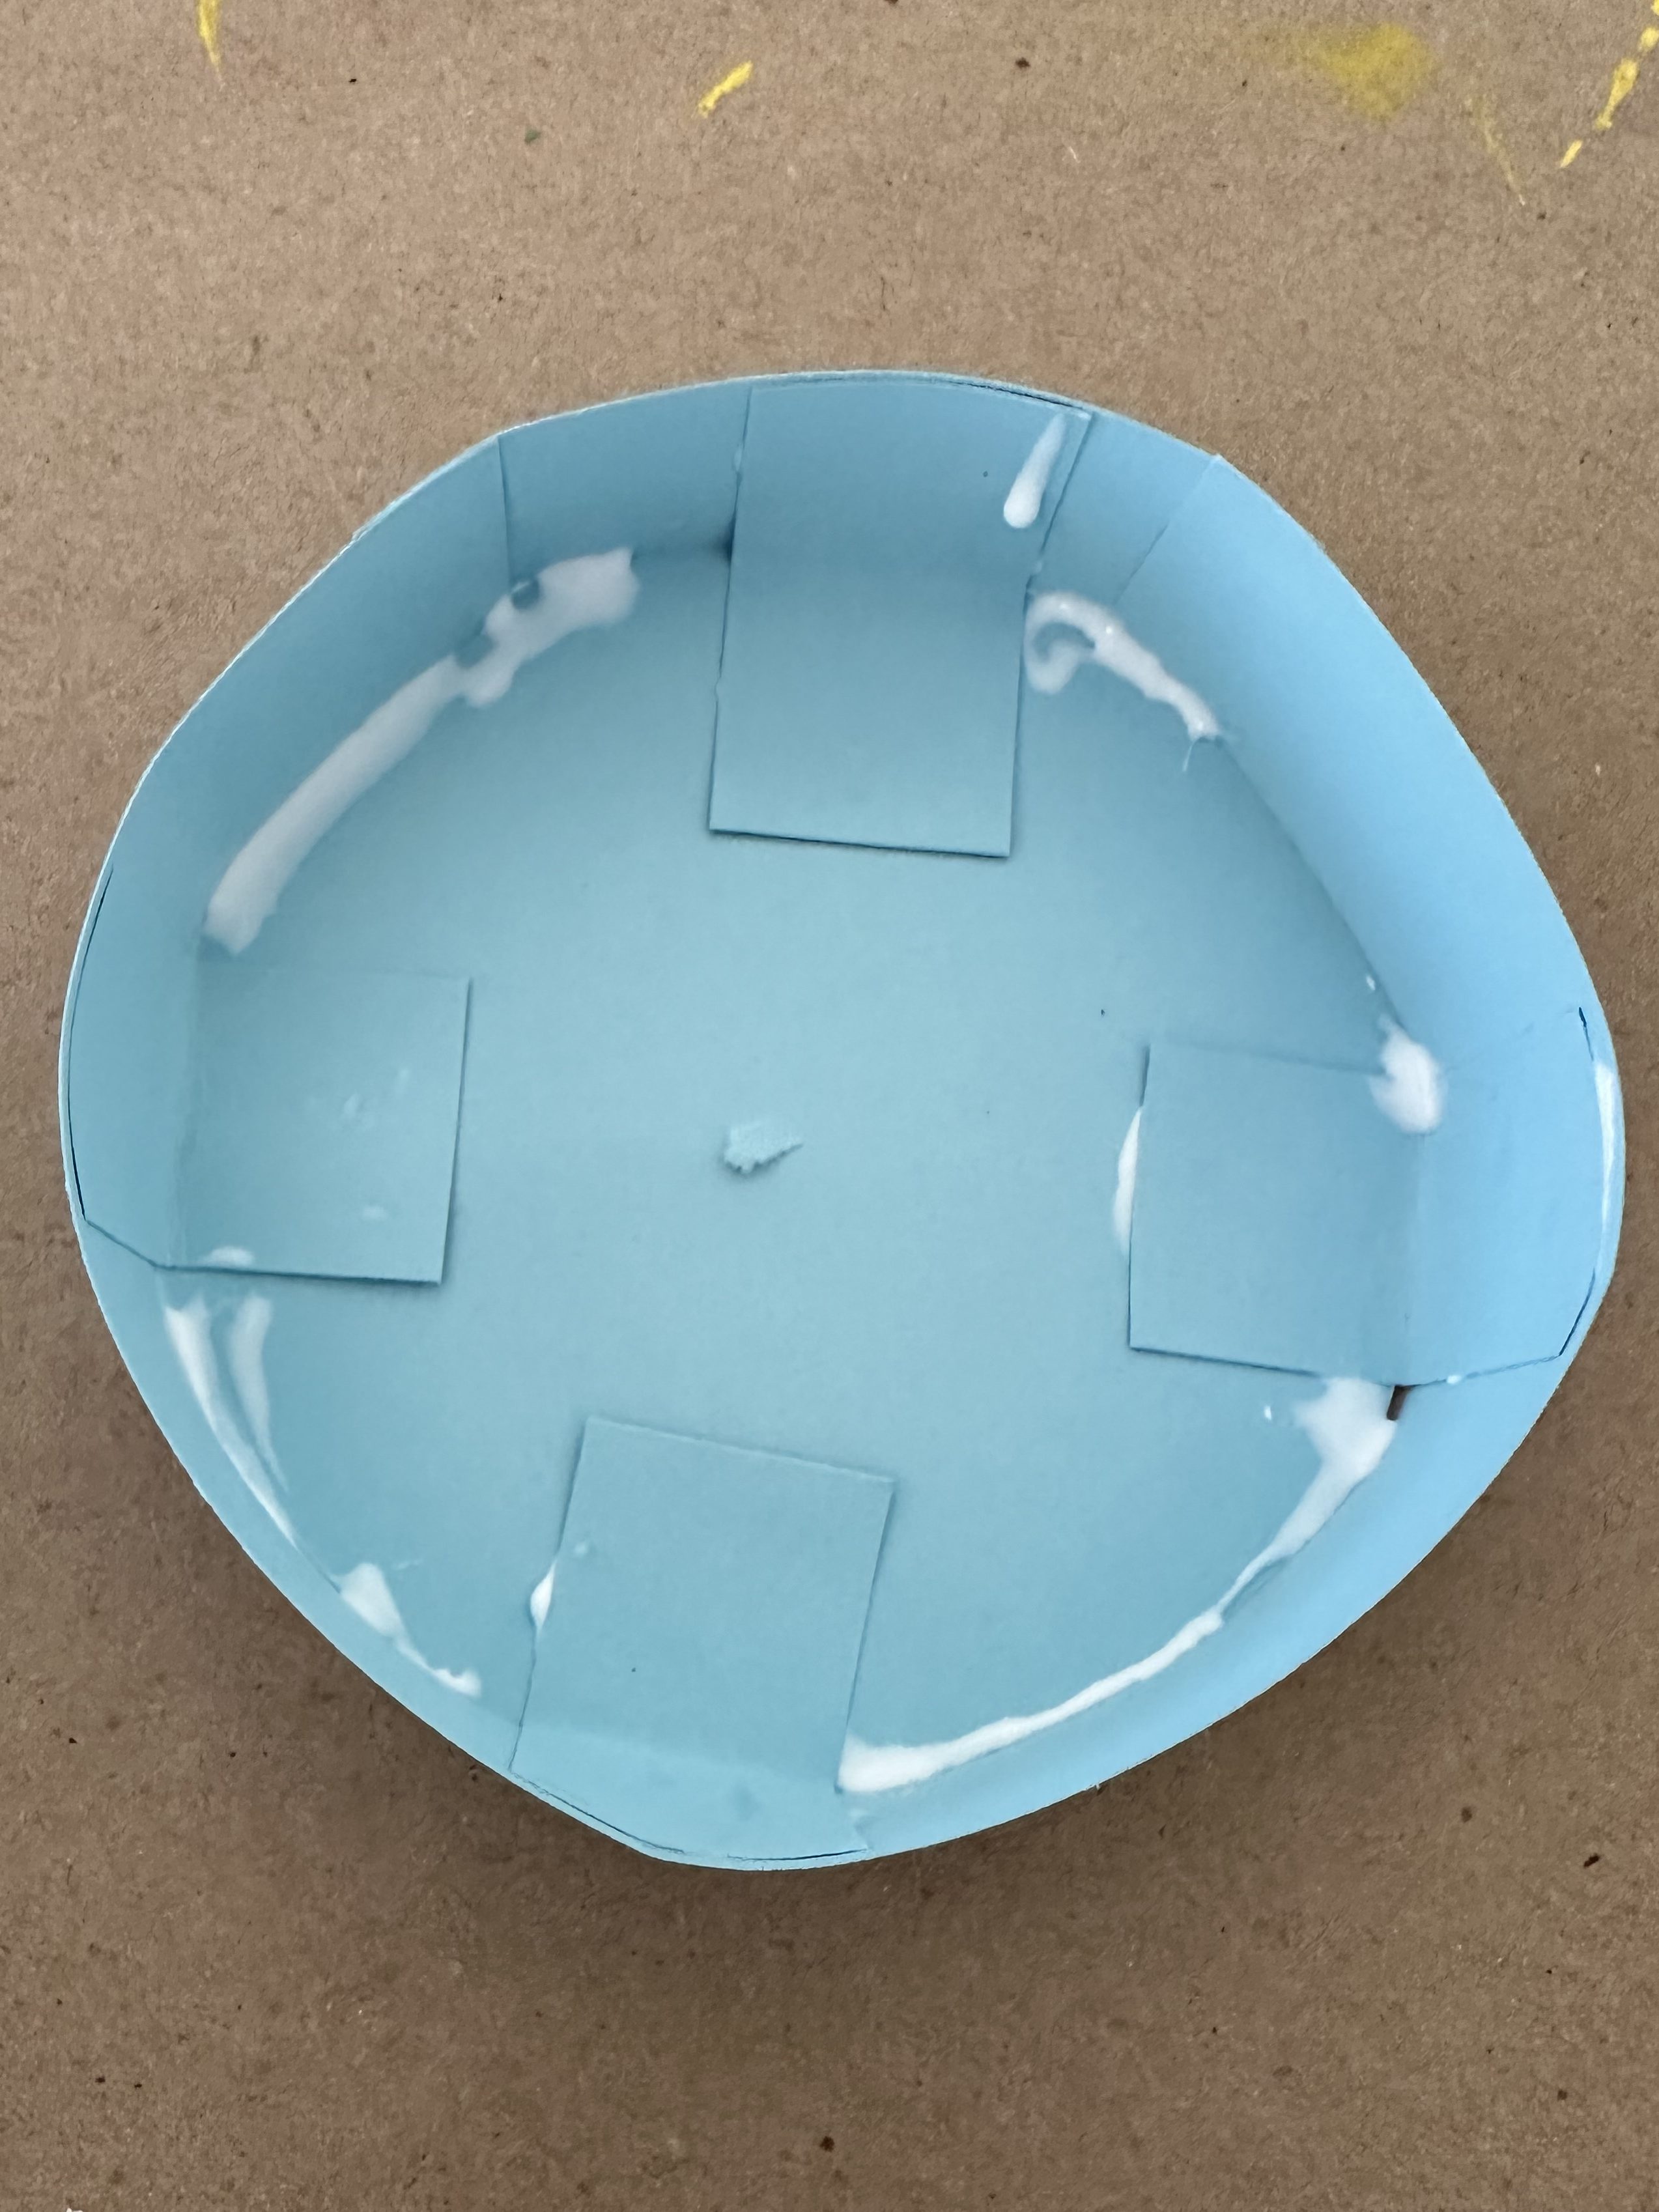
3. Add glue around the inside rim to lock it in place.

Step 2: Assemble the Winder
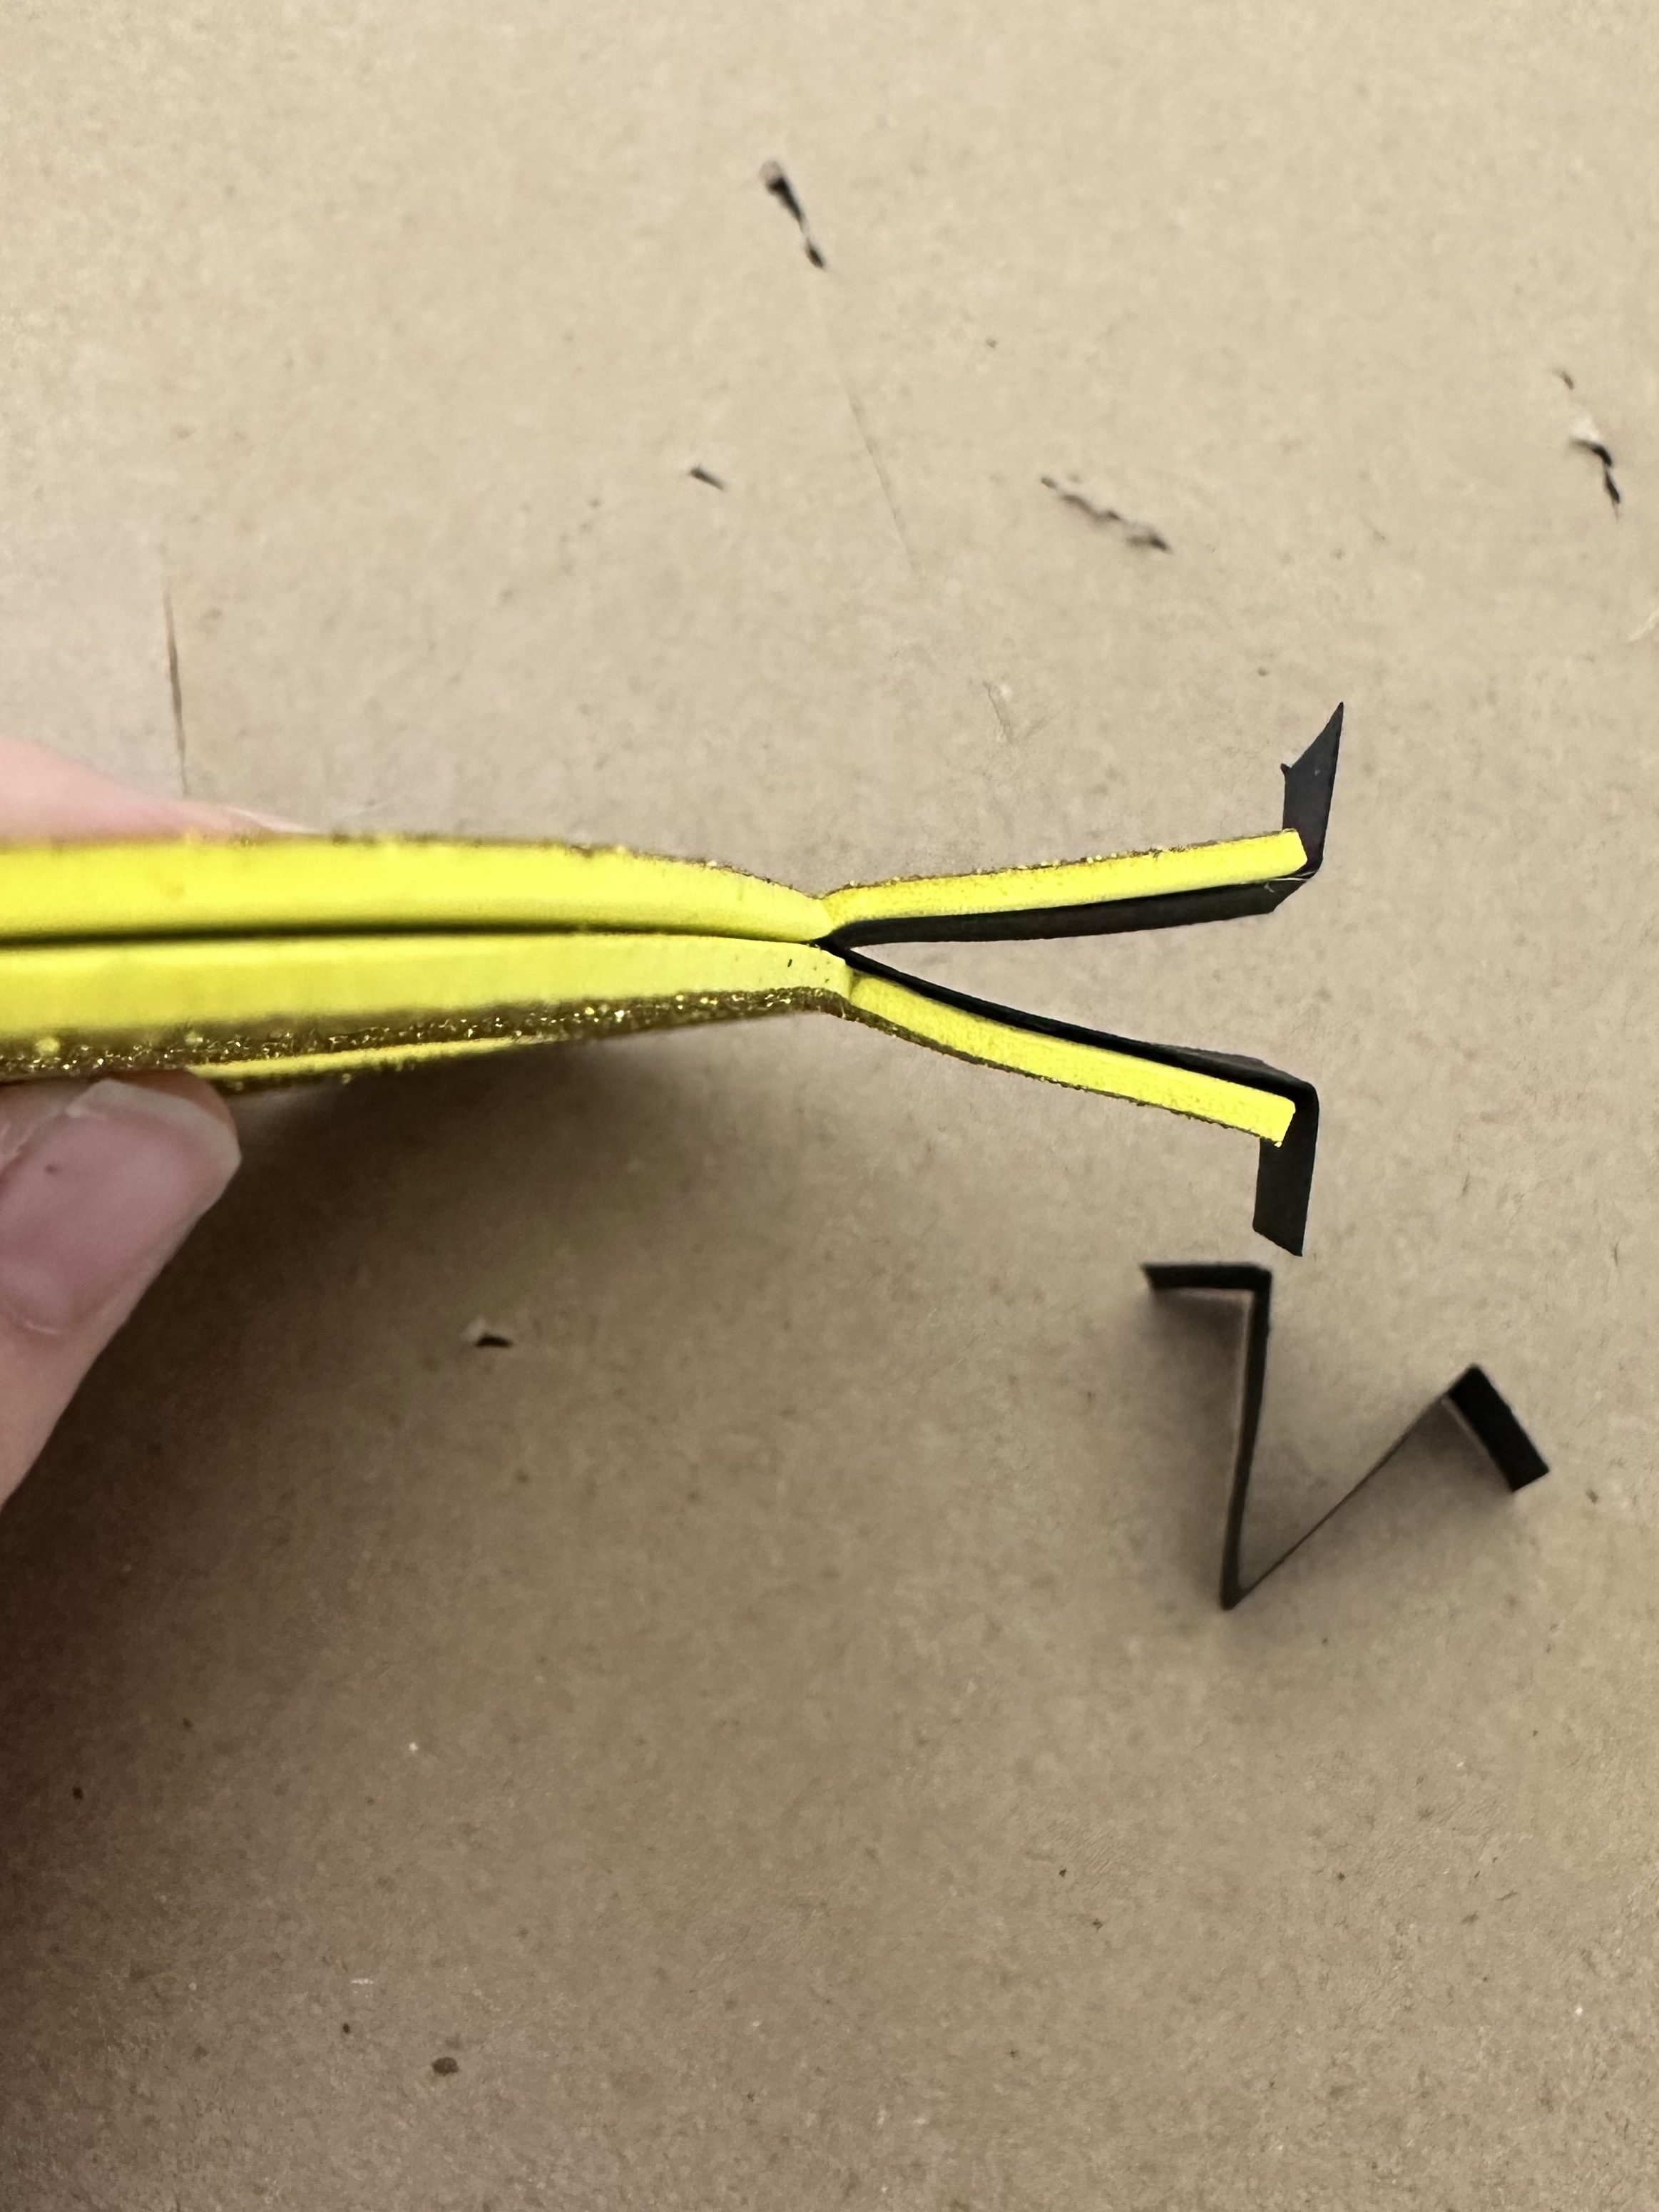
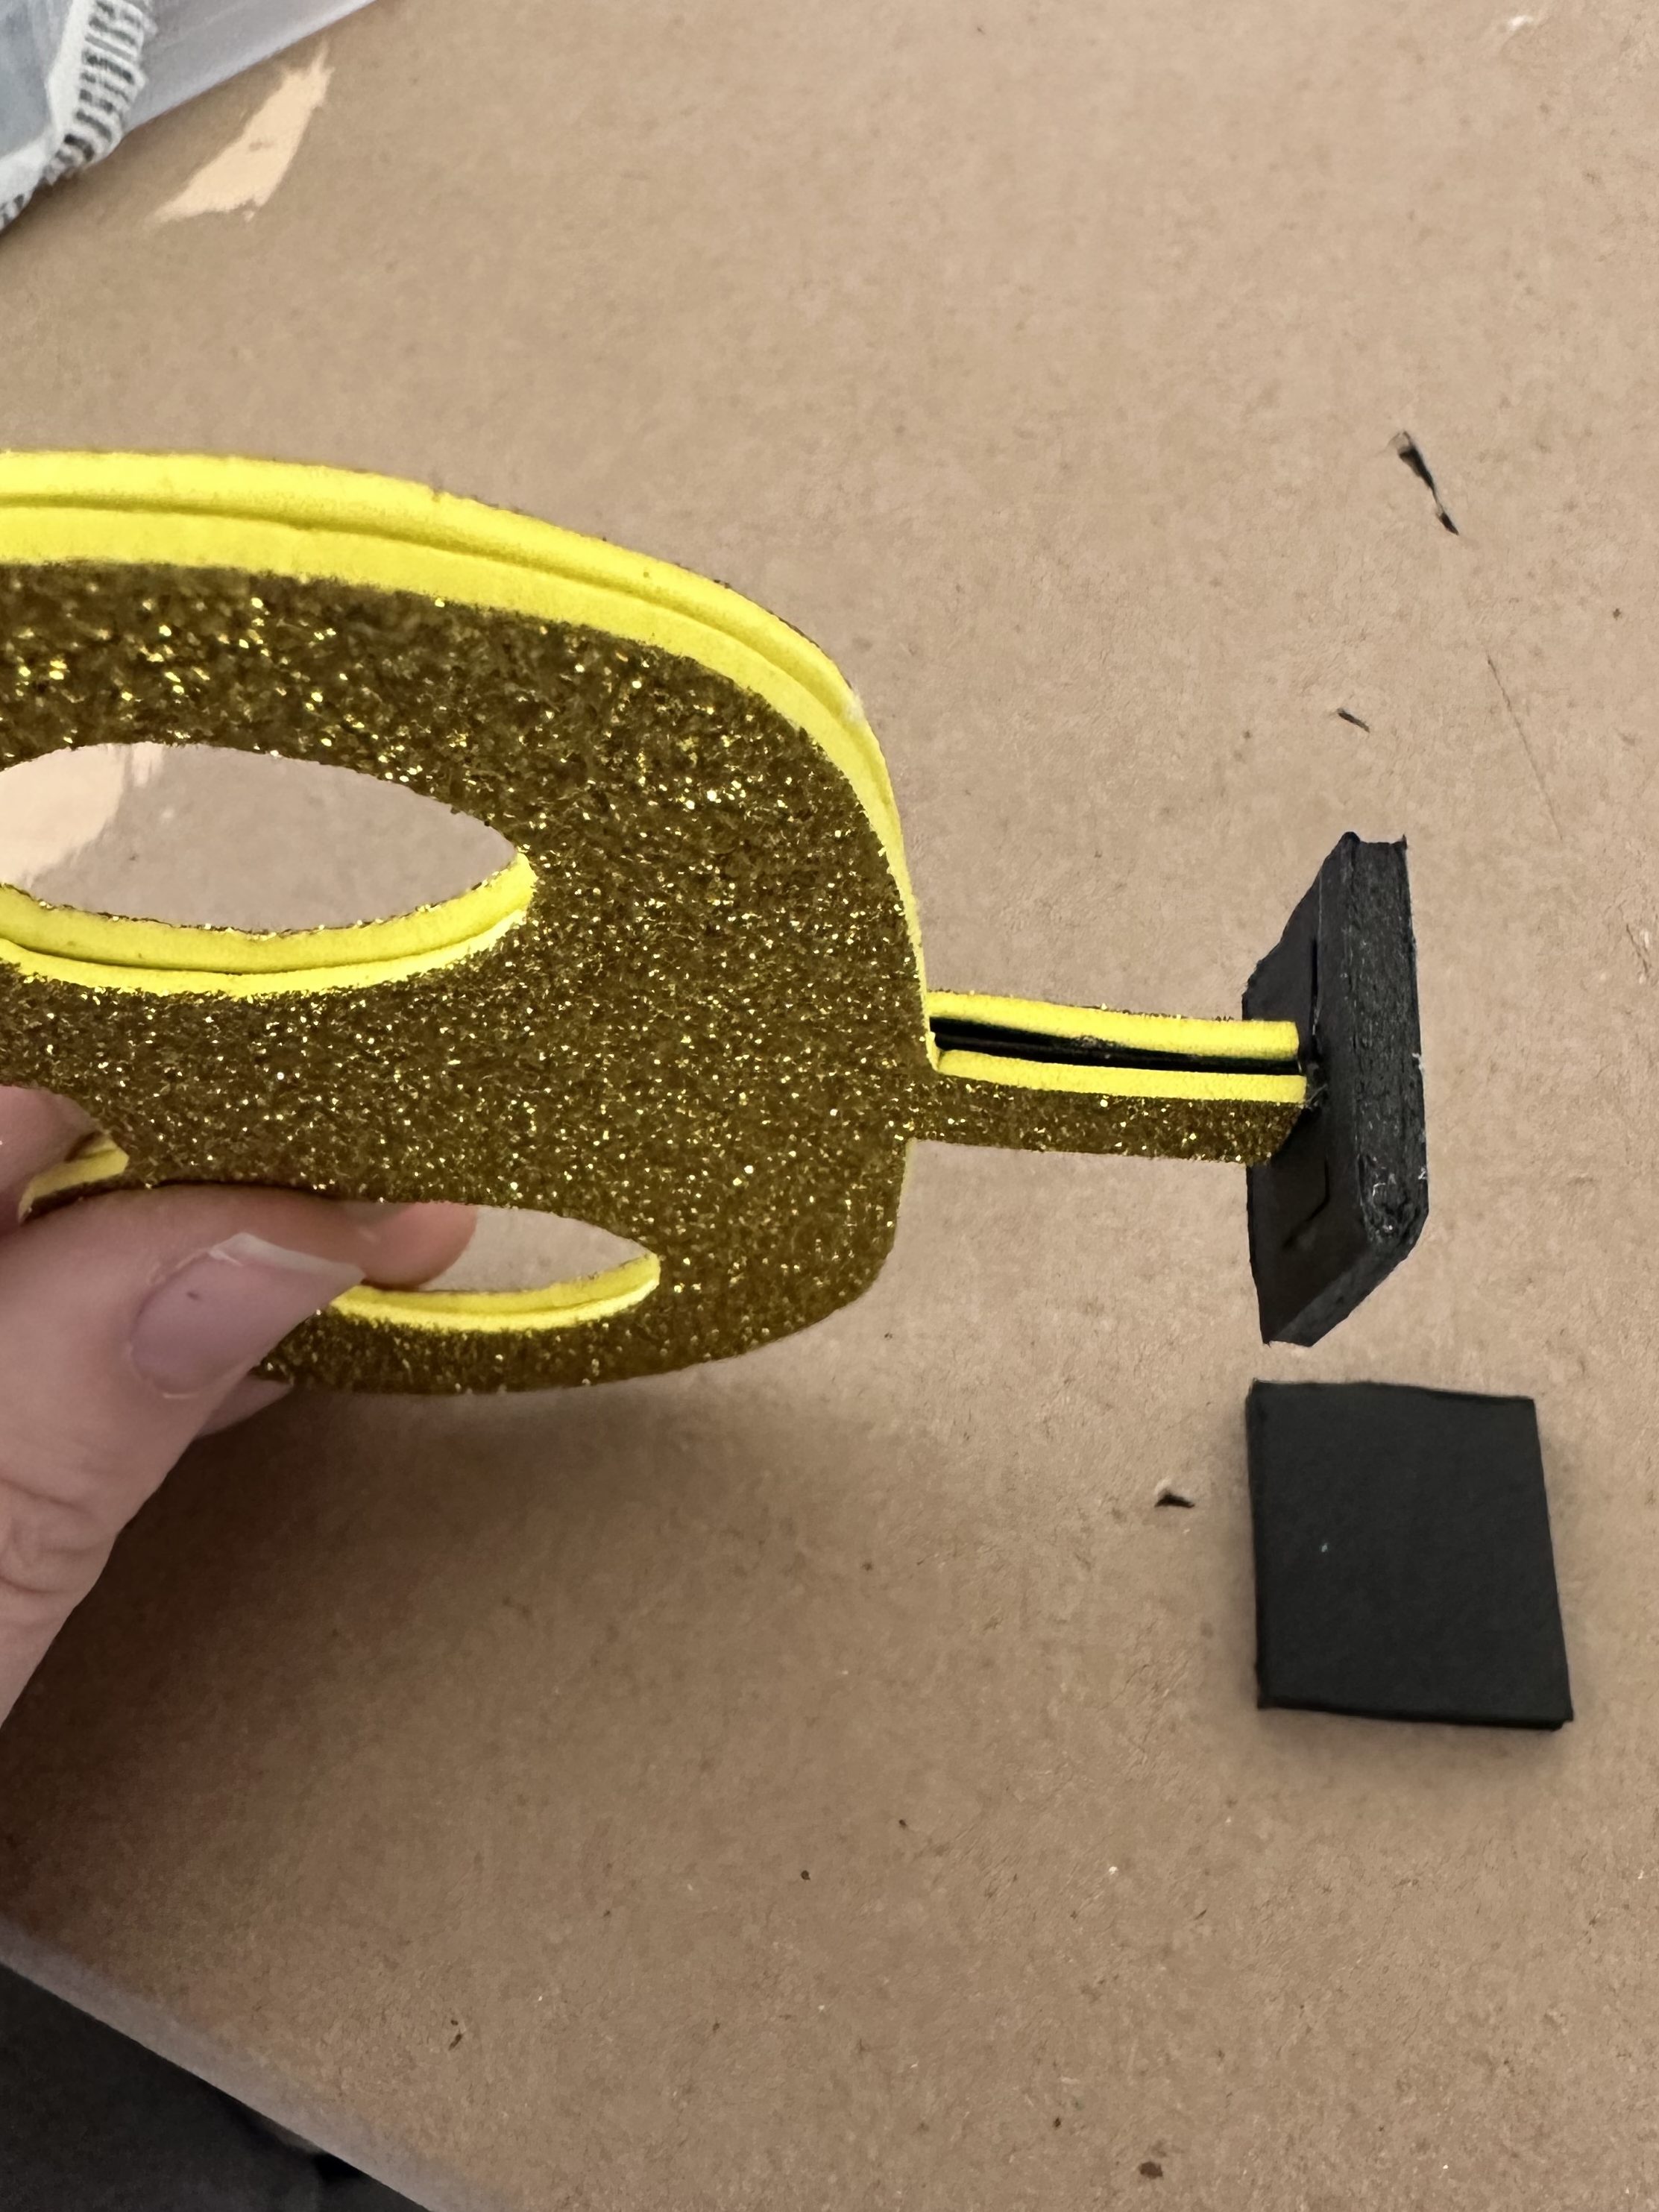
4. Attach this to a small square scrap of black foam core.
Step 3: Put the Bob-Omb Together


Step 4: Balance Him Out
Here’s the part that gave me trouble: the winder made my Bob-ombs too heavy in the back. To fix it, I glued metal mending plates to the bottoms of the feet. That extra weight kept them upright and sturdy.

The Finished Bob-ombs
After repeating the process a few times, I had an entire squad of Bob-ombs ready for the party!
They ended up being one of my favorite details from the whole Mario build. A little time-consuming? Definitely. But also one of those DIYs that really made the whole party space come alive.

Looking for more Mario-themed DIYs?
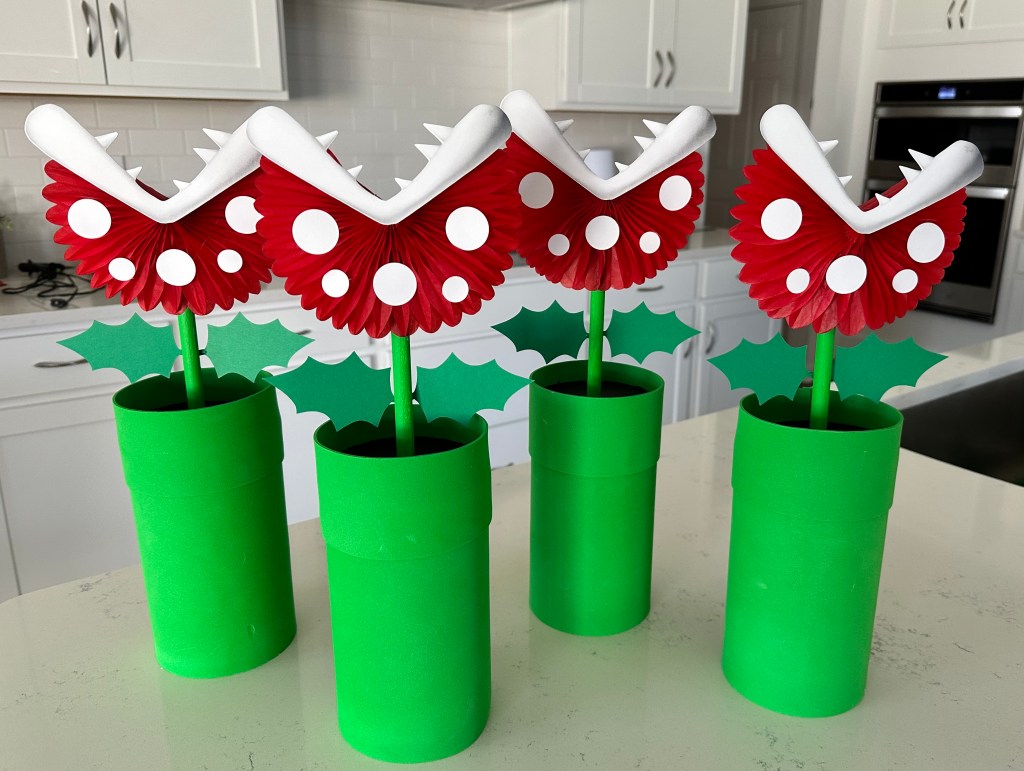
If you enjoyed making these Bob-Ombs, you won’t want to miss my tutorial on DIY Piranha Plants! They’re the perfect companion piece for a Mario party, and I’ve even included free printables to make the process easier. Check out the Piranha Plant tutorial here.


Leave a comment